What is CMS?
A content management system (CMS) | Strapi is a computer software used to manage the creation and modification of digital content.
A CMS is typically used for enterprise content management (ECM) and web content management (WCM).
A CMS typically has two major components: a content management application (CMA), as the front-end user interface that allows a user, even with limited expertise, to add, modify, and remove content from a website without the intervention of a webmaster; and a content delivery application (CDA), that compiles the content and updates the website.
Common Features of CMS:
The core CMS features are: indexing, search and retrieval, format management, revision control, and management.
Features may vary depending on the system application but will typically include:
- Intuitive indexing, search and retrieval features index all data for easy access through search functions and allow users to search by attributes such as publication dates, keywords or author.
- Format management facilitates turning scanned paper documents and legacy electronic documents into HTML or PDF documents.
- Revision features allow content to be updated and edited after initial publication. Revision control also tracks any changes made to files by individuals.
- Publishing functionality allows individuals to use a template or a set of templates approved by the organization, as well as wizards and other tools to create or modify content.
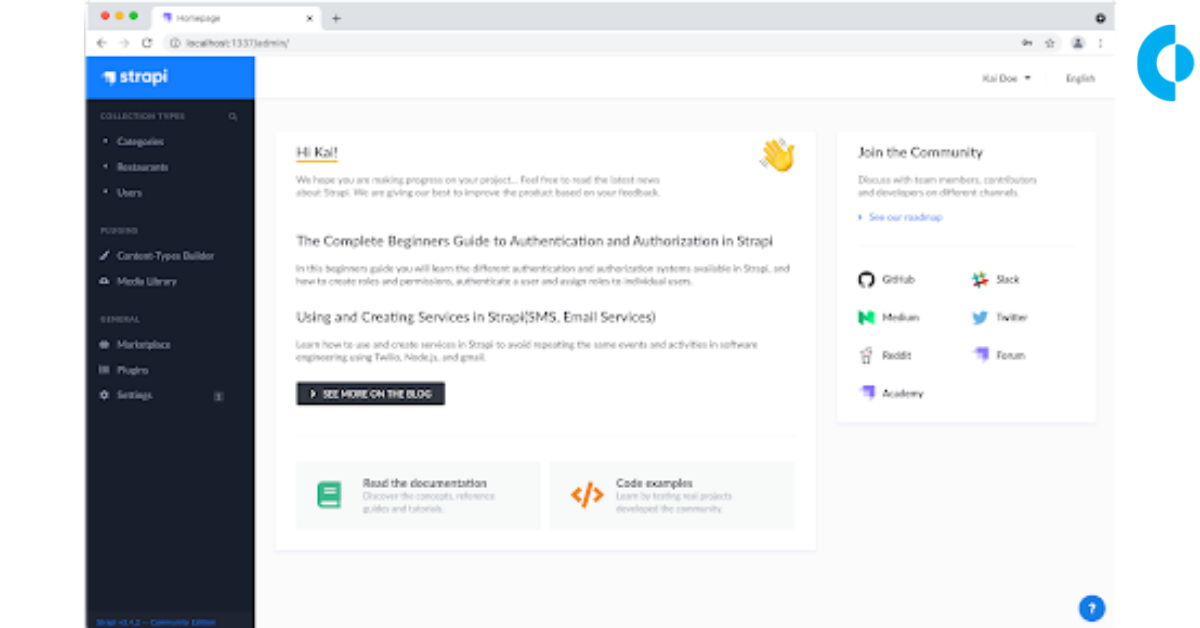
Strapi
The original purpose of the project was to help Bootstrap your API: that’s how Strapi was created. Now, Strapi is an open-source headless CMS that gives developers the freedom to choose their favorite tools and frameworks and allows editors to manage and distribute their content using their application’s admin panel. Based on a plugin system, Strapi is a flexible CMS whose admin panel and API are extensible – and which every part is customizable to match any use case. Strapi also has a built-in user system to manage in detail what the administrators and end-users have access to.
Setting up strapi application:
Just one step to install the strapi application.
npx create-strapi-app my-project –quickstart
After installing we can use a npm start script to start the application and we can register as administrator thereafter we can use the same credentials to login as administrator. In the administrator panel we can customize the application.
Options to customize the administrator panel:

- We can add custom plugins to the administrator panel.
- We can create no.of simple api and database tables at a time with simple form filling.
- We can make routes very simple in a single file.
- We can make simple api triggers by mentioning their name inside the routes.
- We can make custom reusable queries and we can use anywhere we want.
- We can customize policy functions once and we can use it wherever we want.
- We can create reusable functions and we can use those functions anywhere.
- We can see the data of the databases with a good ui and with filtering options.
- We can even make components for the front end with enumeration structure.
- We can use the best data types for databases.
- It provides the best way of uploading images and videos and we can add image urls to the database very easily.
DIVING INTO THE OPTIONS OF STRAPI:
Build your content:
Create collection types with the Content-Types Builder:
The Content-Types Builder plugin helps you create your data structure. Here collection types means data structure of the table. If we create a collection type that means we are creating a table in the database with some fields.Here in strapi we have plenty of options to add data types to the fields.Here we can also create relations like one to one, one to many, many to one, many to many etc… by choosing the selection options.
Set roles and permissions:
Not every api should be accessible to everyone; we have to add custom roles and permissions to access the api. In the administration panel we have roles and permissions options where we can create roles then we can add permission to them.
CRON operations:
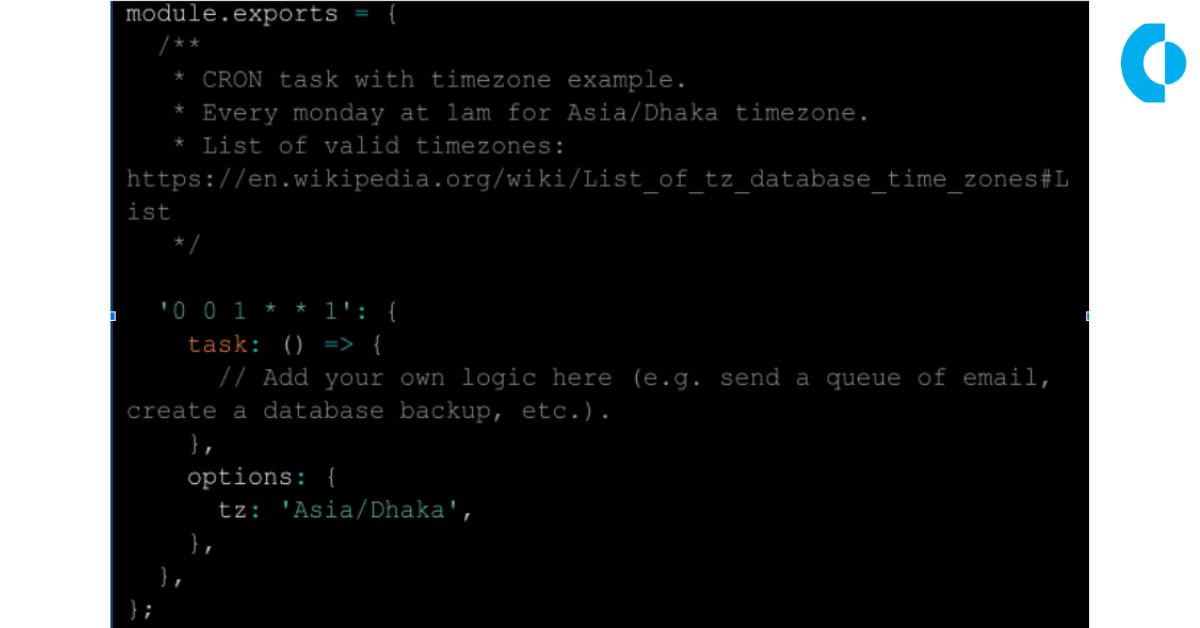
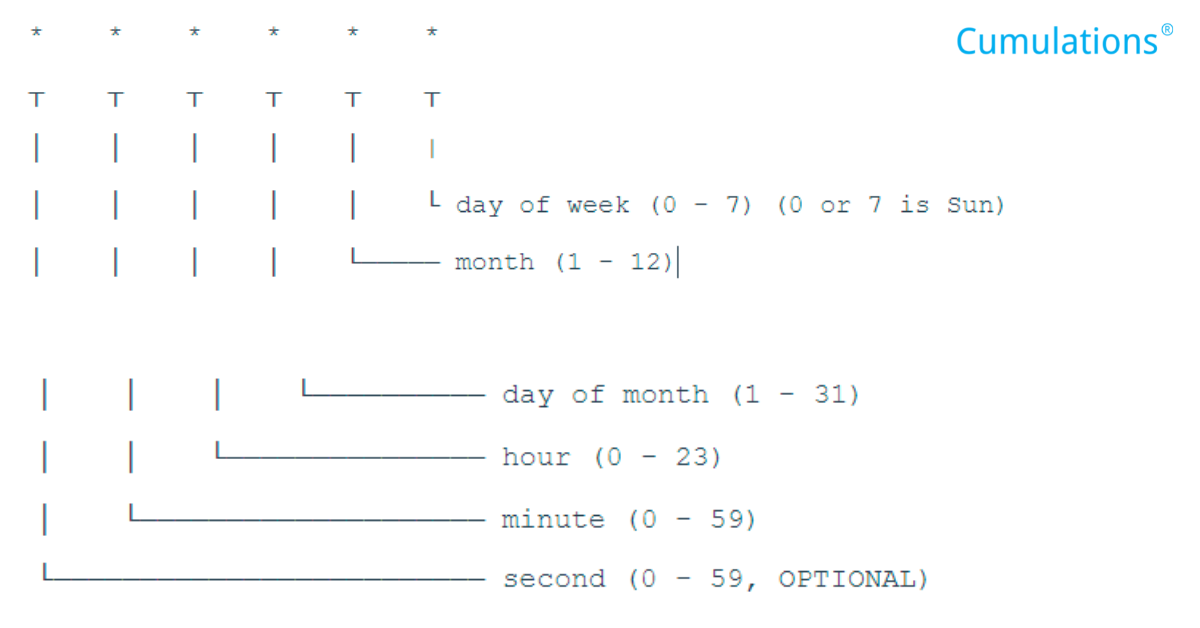
Cron operations made simple in strapi applications.To use cron we just need to enable cron in server.js file. Let’s look at a sample example.

Below are the instructions to write cron operations:

For the complete documentation for the strapi you can visit the official website of strapi
To know more about strapi,


 +91-984-5825982 | +91-996-4689921
 sales@cumulations.com
 Send your requirement